|
|
Here you can find scale plans of the cabin from The Evil Dead. These plans were adapted from a project attempted back in 2005, to make a short lego stop-motion animation version of The Evil Dead, although this project has been long since abandoned. Below are the plans, and further down you can read more information on the Lego project itself. You can click to enlarge any of the plans below.
|
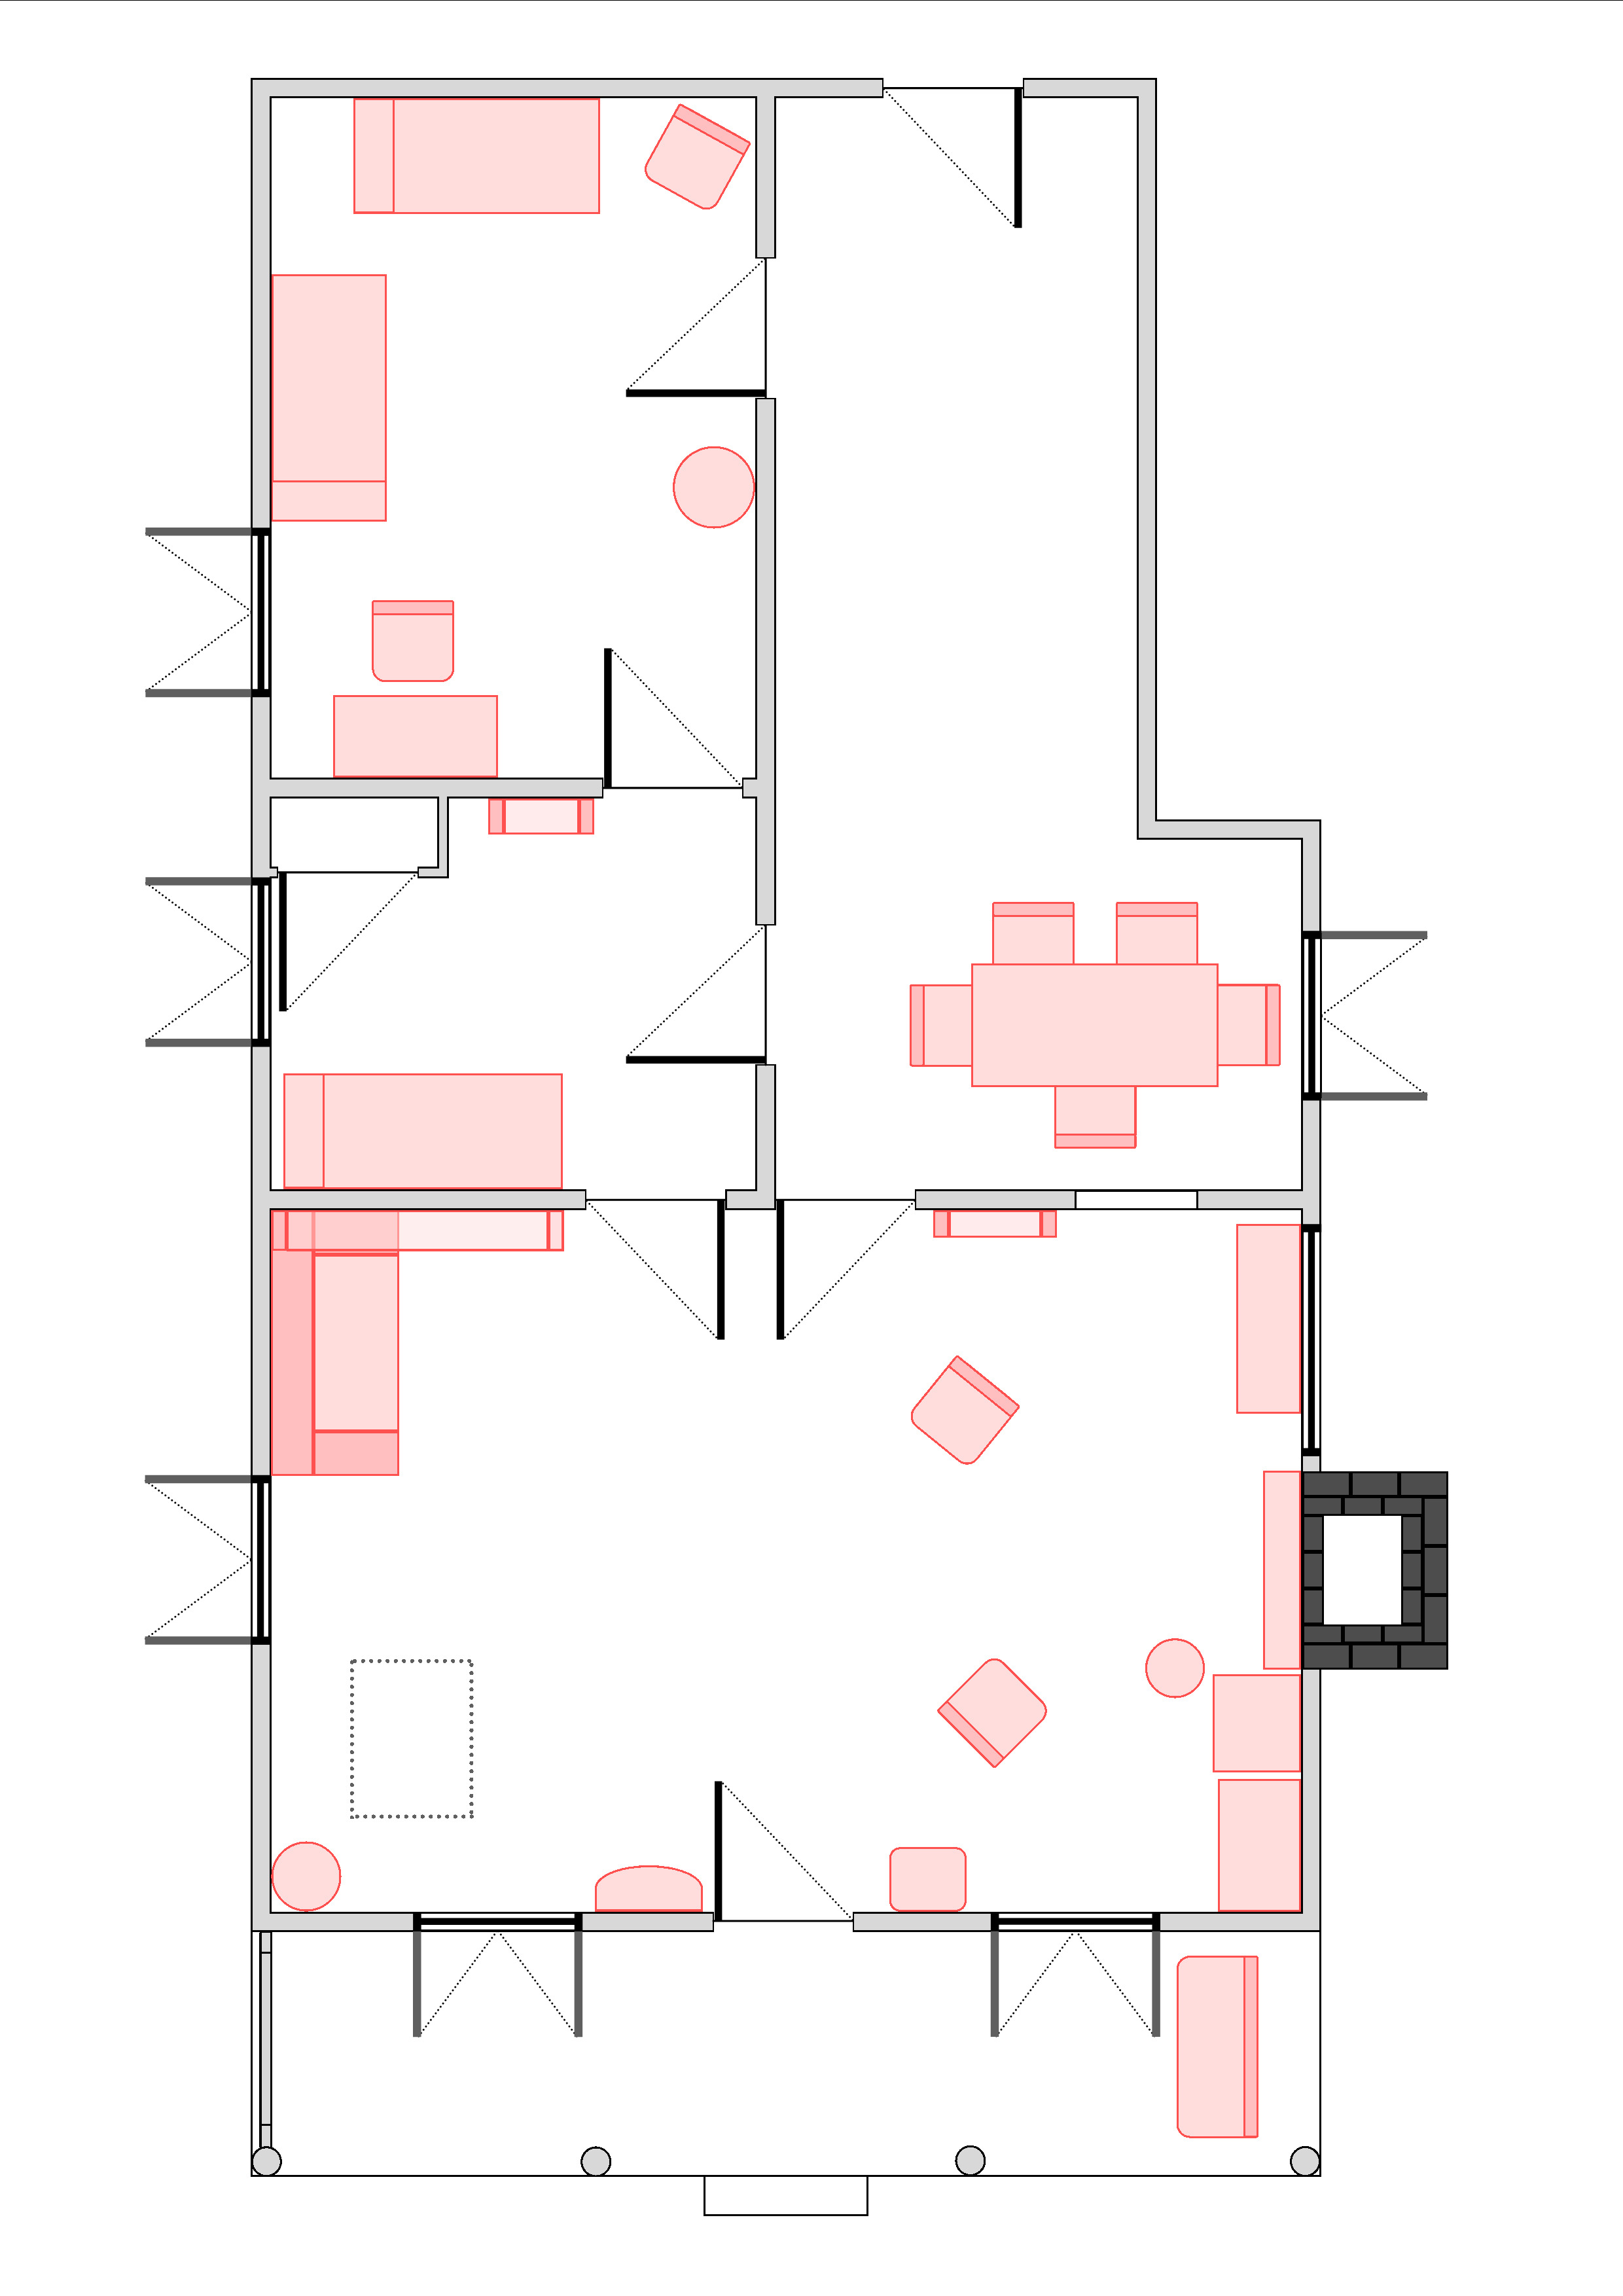
The Cabin & Porch
|
|
|
The Cellar
|
|
The Workshed
|
|
The Bathroom
|
|
|
The above are isolated plans of each section of the cabin. The bathroom is separate as in the real cabin layout there is no place for the bathroom to be, as the side door from Scott & Shelly's room would lead out into the hallway & dining area which runs the length of the cabin from the back door to the large main room. According to Bruce the bathroom was shot in Rob Tapert's farmhouse. Below you can see a ground-floor overview of the entire cabin area
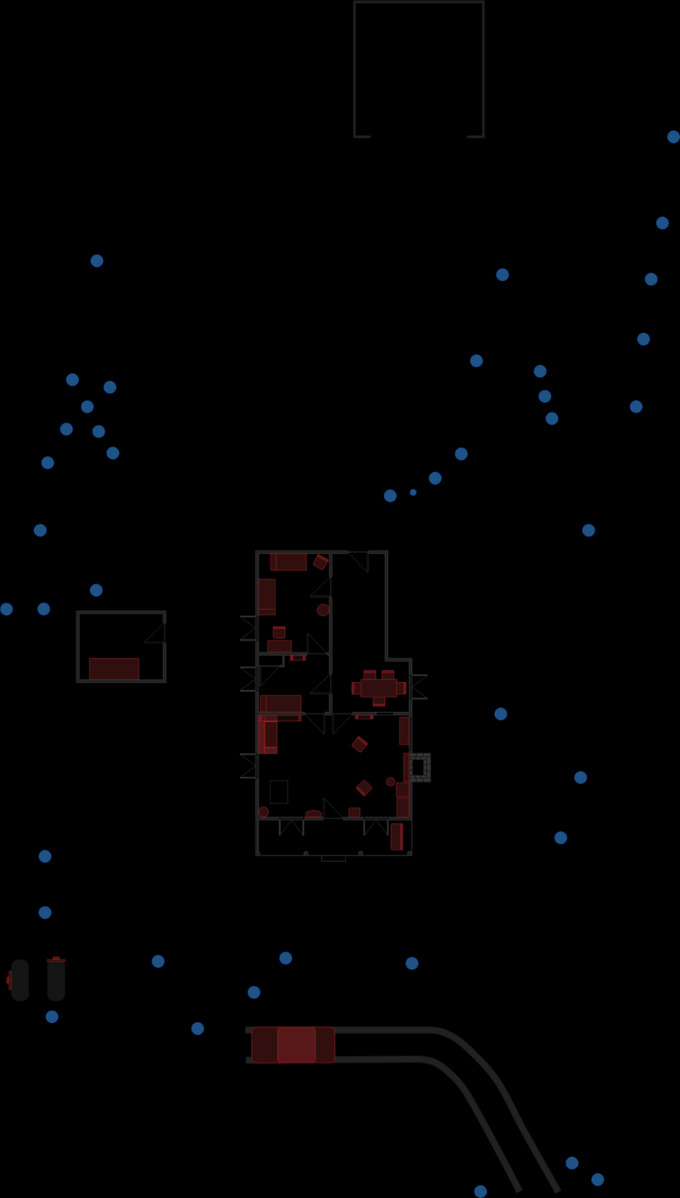
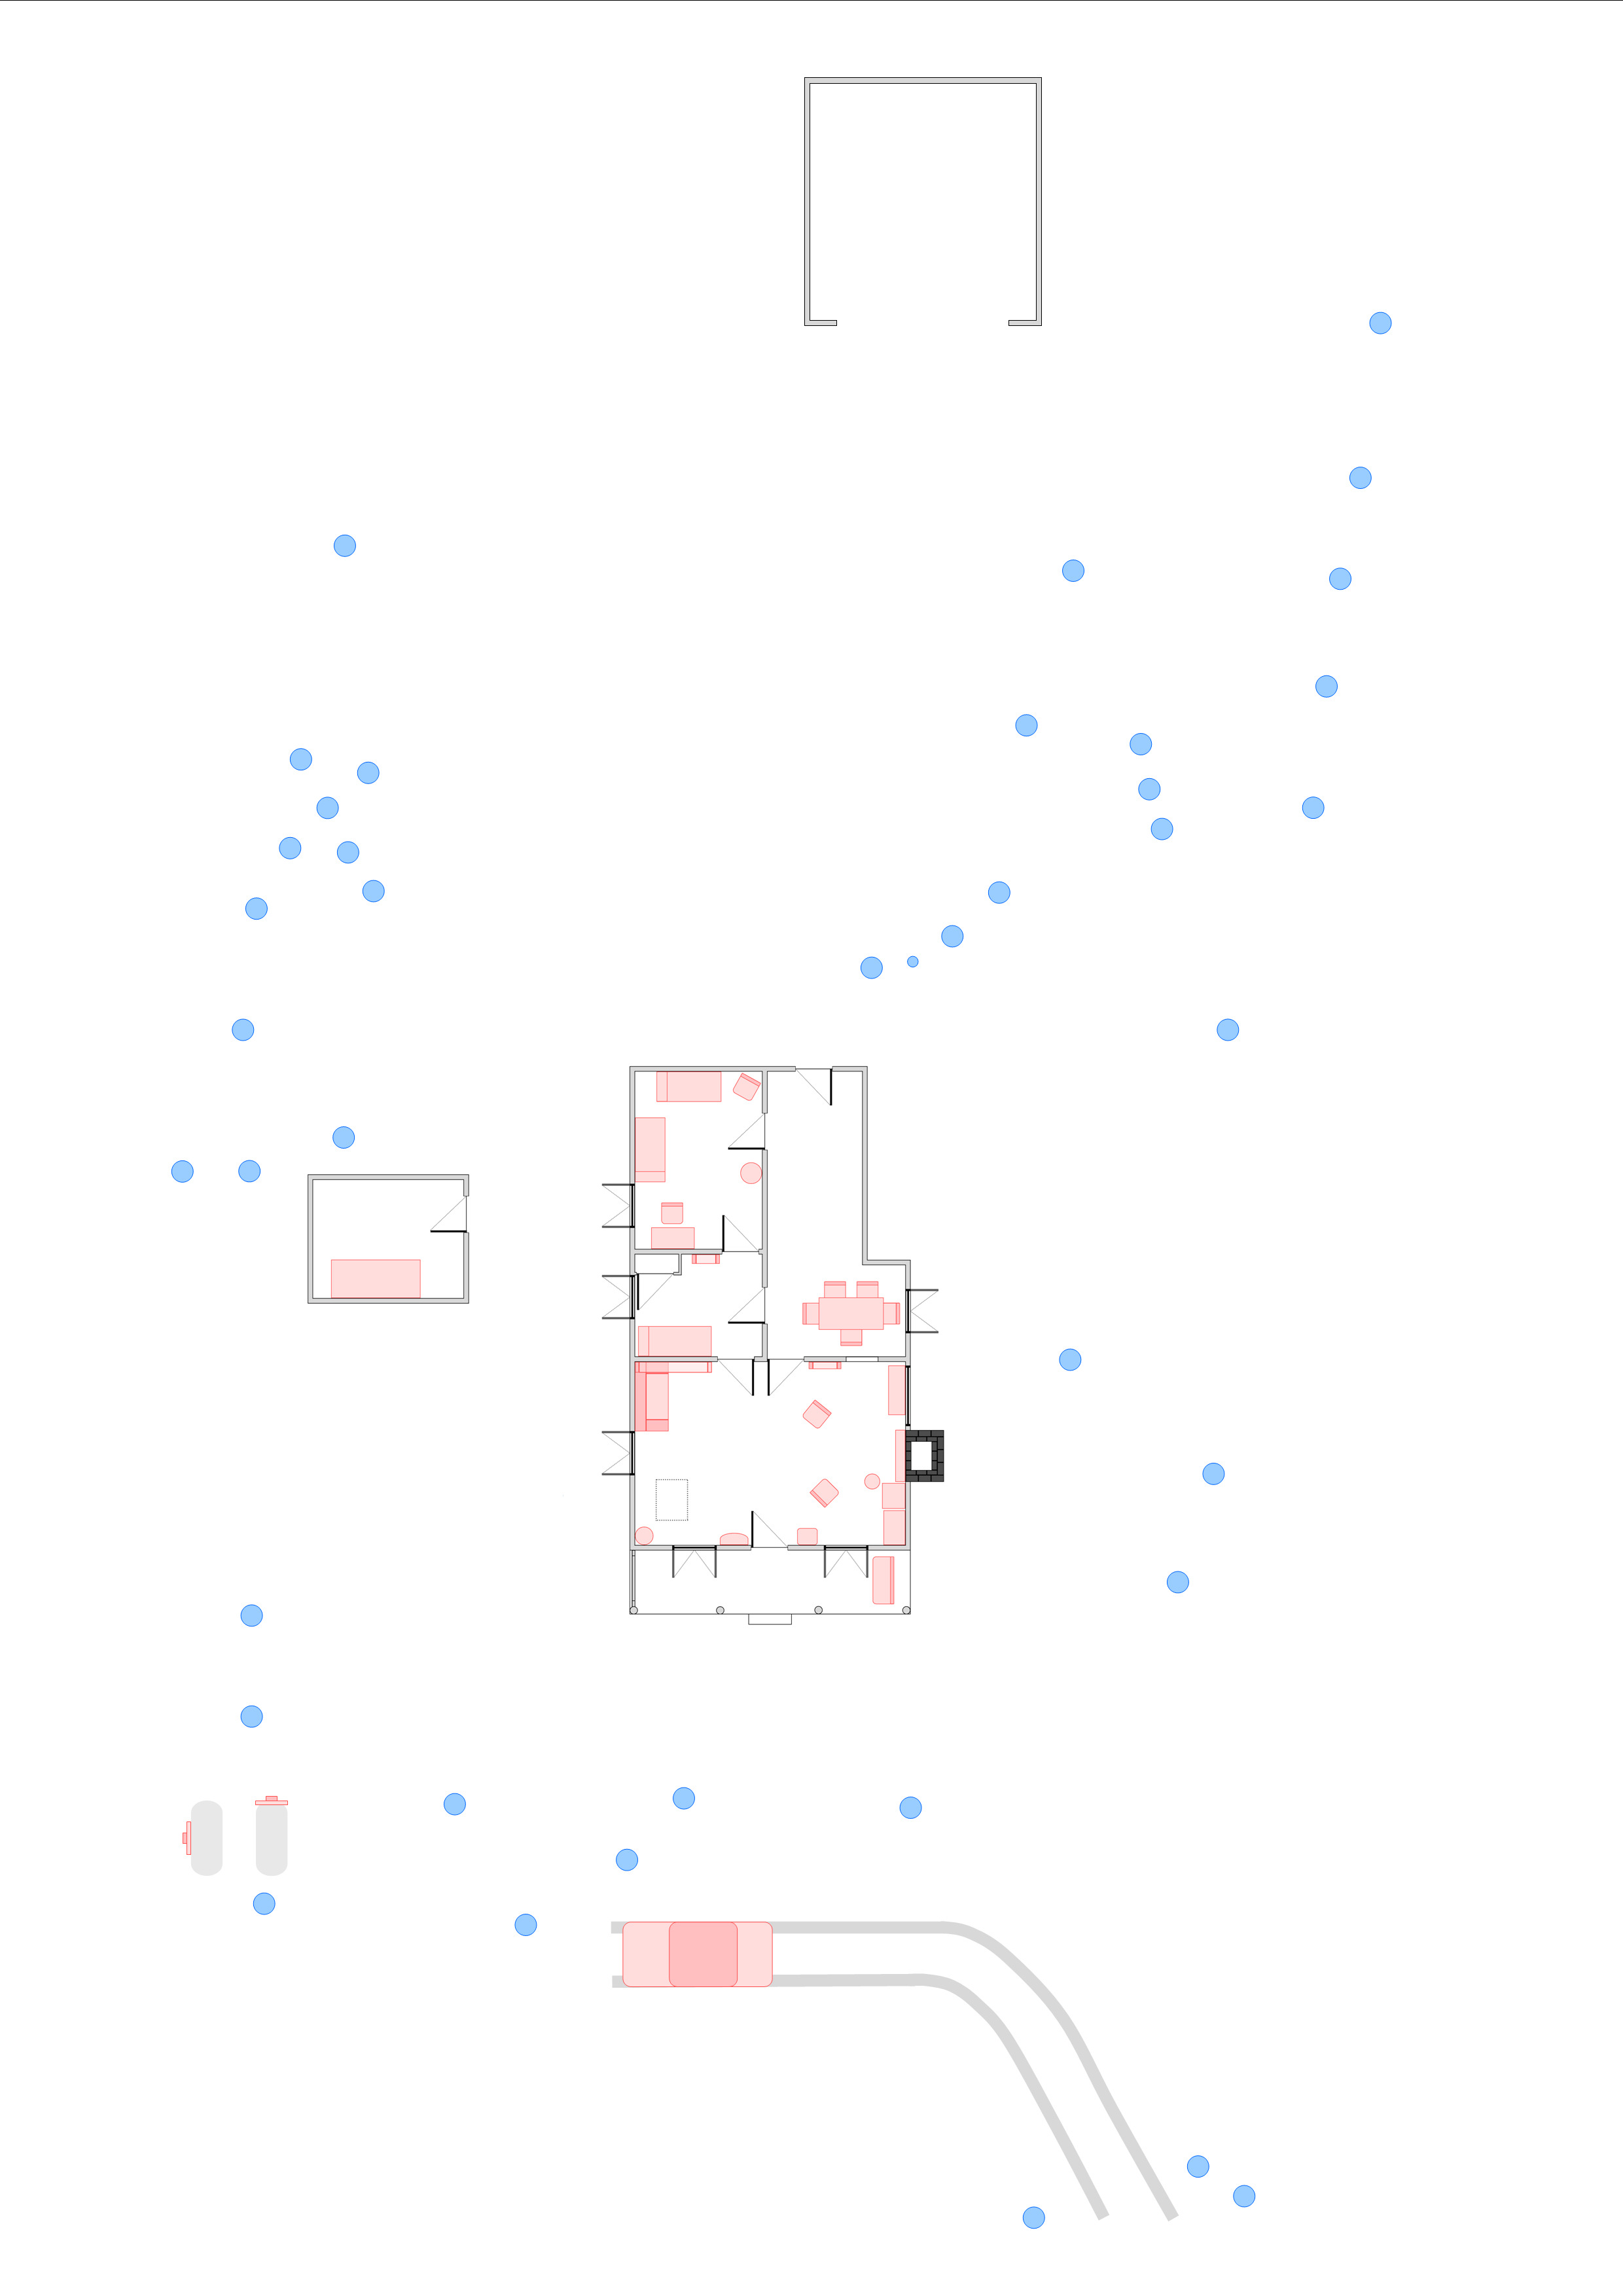
Cabin & Forest (Each blue disc is a tree, note the barn at the top and the Oldsmobile and Shelly & Linda's graves at the bottom)
In addition to clicking any of the above images for a larger white-background version, you can also download all the above plans as a Zipped three-page A4 printable PDF file Here.
The Evil Dead Lego Stop Motion Animation Project
As mentioned above, this was a project undertaken over a few months in 2005, to create a short lego stop-motion animation version of The Evil Dead. While no footage was ever shot, you can see how the project first began and progressed below.
|
In order to create scale plans for the Lego sets, I designed complex plans in MS Publisher to allow me to work out the exact layout of the cabin, which parts I would need, and how they would fit together, along with the locations of things like the trees, workshed, barn and the graves dug outside in respect to the position of the cabin, and their scales in relation to each other.
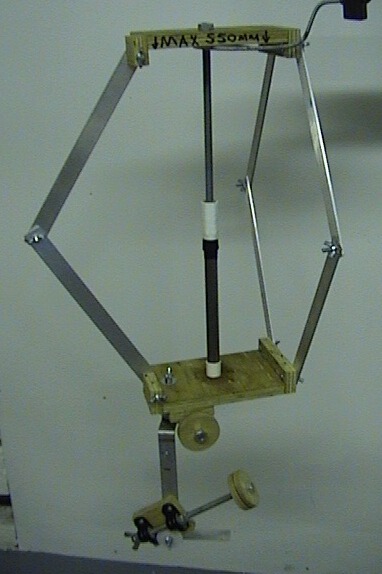
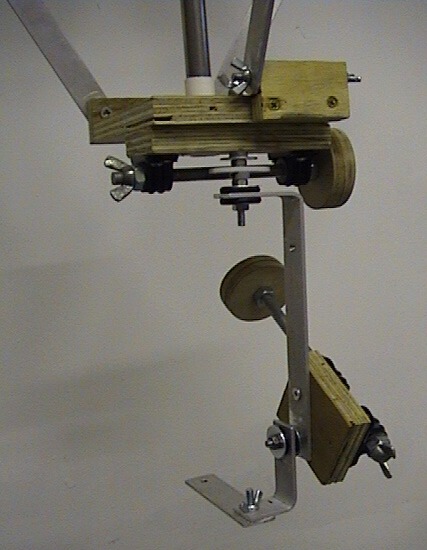
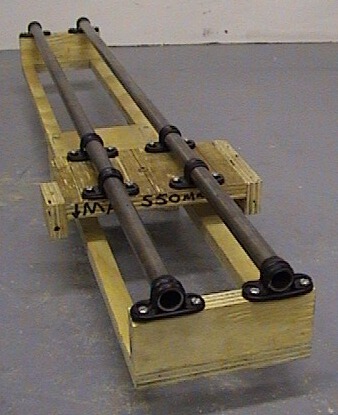
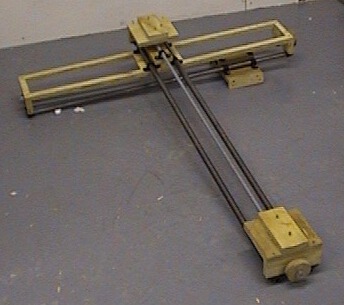
Then I designed & built a wooden motion control camera rig to allow the camera movements needed for the animation. With this rig the camera could track forward & backward & left & right, track up & down, and rotate 360 degrees in any direction (facing up/down & backward/forwards) With all the movement combined the camera can sit level with the ground, or up to 50cm above it. It can track 4ft forward & back, 3ft side to side. The camera mount itself can rotate horizontally or vertically 360 degrees in a full sphere. The whole lower portion of the rig can slide to either end of the table to allow shooting over the whole length of the 8ft set. You could also use any combination of the above at the same time and all moving in tiny increments via turning the various threaded bars to achieve complex camera moves. Once built the final size of the whole cabin/forest area I was building (to scale) was 8ft by 6ft, but this didn't include the bridge or most of the path to the cabin. Just the area around the cabin itself.
The project was abandoned because the wooden rig just wasn't rigid enough and even the slightest fraction of a wobble could ruin a shot. That said the basic ideas & mechanisms were all sound and I did draw up plans for a scaff-pole version which would have worked. The wood rig in total cost about £60 (+ Lego), The scaff-pole version would have worked out many times that price but I didn't have a pile of money to spend on starting from scratch so it got put on the back burner, and I moved onto other projects.
|
|

The Cabin, assembled as a test from odd multicoloured bricks

The Lego cast, along with some of their props
|
Below you can see photos covering the building process of the motion control rig. Although all the plans on this page were intended to be used for lego parts, the basic layout, scale and orientation of the real cabin & surrounding area/buildings is identical, so they may be useful for other things too. Just a point of note, the camcorder that was to be used in this project, was also the camera that was taking all the photos, which is why it isn't shown fixed in place in any of the shots.
|
|
|
|
|
|
|
The camera would be fixed at to the base of this, allowing it to pan left & right, track up & down, and rotate 360 degrees in any direction
|
|
|
|
|
|
|
|
These rails allow the above camera mount to track forward & backward & left & right, so the camera can move anywhere on the table
|
|
|
|
|
|
|
|
The 8ft x 4ft base, onto which the Lego would be constructed. The camera is mounted on overhead, so it can 'float' anywhere on the table
|
 The 'finished' project, or at least as far as it was taken, before it was dismantled and the materials used for other projects
|
|
|