This page details a July 2015 project to create a replica of Tom Sullivan's 'Kandarian' dagger seen in The Evil Dead, to be used in the 'Cabin' chainsaw photo backdrop on EvilDeadChainsaws.com. While technically this Evil Dead II themed backdrop required the revised design dagger shown in the sequel, rather than the plain metal bladed original, the first film's plainer dagger has always been personally more appealing.
Clicking any of the below images will display a larger version in a 'Lightbox' window. Use the arrow icons or your keyboard's left/right arrows to navigate to the next photos. You can also middle-click an image to open the larger version in a new window. If you want a full-resolution version of any of these images, or more infomation on anything featured, then please ask.

The whole dagger took two days to make, and cost around £84, which sounds overly expensive but the costs mount up. The most expensive elements were the two Visible Man kits, luckily bought from an US Ebay seller who had two listed together, saving on shipping to the UK. Here is a breakdown of the full costs;
1 x Flat ground flat steel bar (500mm x 5mm x 30mm) - £15.08
2 x Visible Man Kits - £33.66
2 x Sets of chicken bones, cleaned & dried - £5.00 each
1 x 1lb pack of gray Celluclay - £9.49
1 x 200g jar of instant coffee - £2.90
1 x Plywood offcut - Free
1 x 250ml bottle of Decra Sheen - £4.96
Various colour 14ml Humbrol hobby paint tins - £1.60 each
The original dagger was made from scratch in 1979 by Tom Sullivan prior to leaving for The Evil Dead's location shooting in Tennessee, and its creation was surprisingly quick & simple. He bought some 1" wide flat stock of aluminium from an East Lansing hardware store, then cut it to a point with a hacksaw, and grinding the edges with a power tool. For the hilt of bones, he took a few handfuls of a papier-mâché product called Celluclay and shaped a thick curved handle over the blade. He stuck dried chicken bones and twelve-inch skeleton model kit parts into the Celluclay, and let it dry. Lastly he painted it with some acrylic paint. Above and beyond what Sam had called for the dagger to do, Tom also drilled a hole through the Celluclay & miniature skull on the hilt, so tubing could be connected and blood could flow out of the skull's mouth. For use on Evil Dead II, Tom redesigned the blade from a simple pointed piece of metal to a tail-like tapered set of bones, which was sculpted by Mike Trcic & Brian Rae, Tony Ellwood made a mould and cast copies of the original hilt, and then both hero & stunt copies of the knife were produced.

A screenshot of the 'Kandarian Dagger' from The Evil Dead
In January 2008, User Marc/LeMarchand on the RPF (Replica Prop Forums) made his own replica dagger, posted photos, and advertised as selling replicas totalling $200.00 including postage. I bought one in May 2013. While it was pretty good, it wasn't hugely accurate. The blade was too short, the bones were too sparse on the hilt, and given that it was a painted resin cast, it needed to be painted from scratch. At the time I re-sculpted and lengthened the blade, and did a fair paint job, but it still wasn't ideal, and have been thinking of making my own for some years.
A LeMarchand The Evil Dead II 'Kandarian Dagger' replica, assembled with a personally modified blade & painted
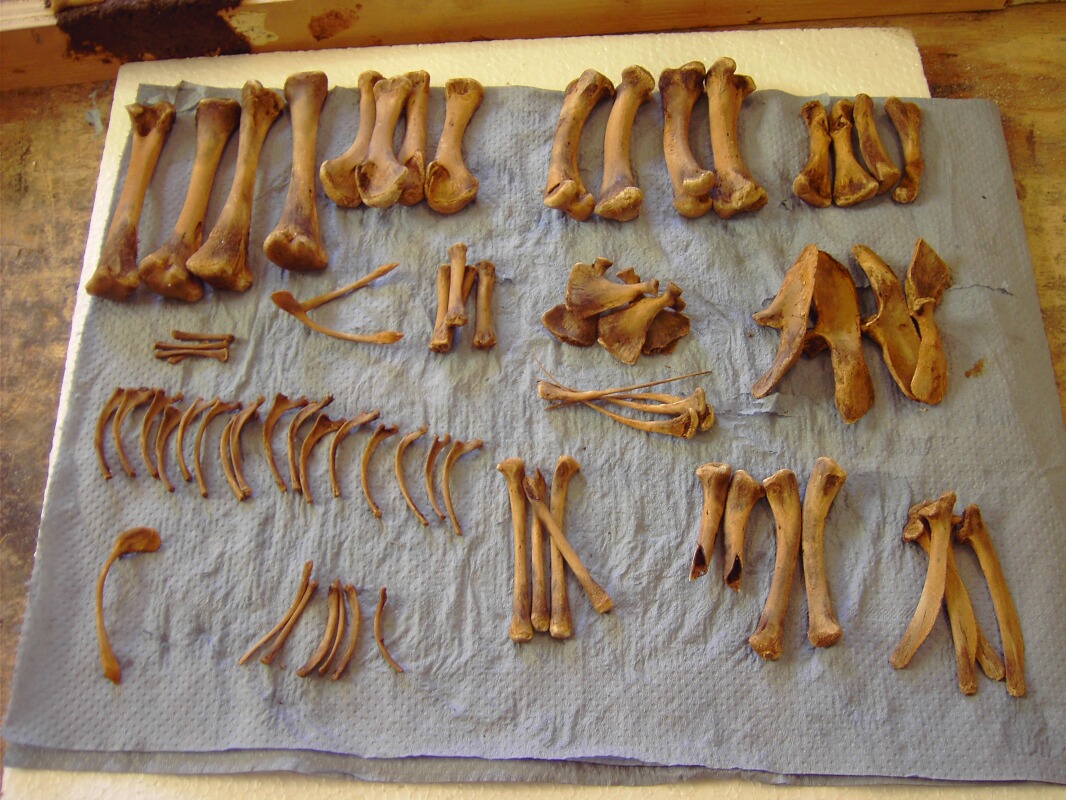
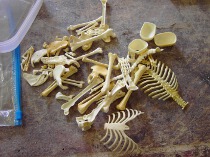
The first element for my replica was the chicken bones. According to Tom, he only used chicken bones. Turkey bones are much too big and will look out of place. So, two roast chicken carcasses were dismembered and the bones largely scraped clean of meat, then they were boiled up in water for 15mins and then scrubbed clean with a scrubbing brush. These were then left to dry outside in the sun, which took around 4 days. If you boil the bones for too long, or dry them out in a hot oven, you'll find they become very brittle and will just disintegrate. 15mins of boiling and air drying in the sun seems to work fine though, the resulting bones are really strong. Then the bones were soaked for a few minutes in around 500ml of boiling water, with two tea bags in. This gave the bones an ageing yellow look, once they dry out. If the yellowing is not strong enough you can just do the same again. If it's too strong then soak them in plain boiling water and the brown staining will come out into the water somewhat. Once dry, the bones are finished. The Visible Man bones needed some assembly with superglue, as well as painting. In the end I only used four colours of 14ml Humbrol hobby paint tins, although I bought twelve in total just to cover myself; mainly browns, tans & greys. The paint finish was done to match the dried chicken bones I had, and was built up in a few layers.
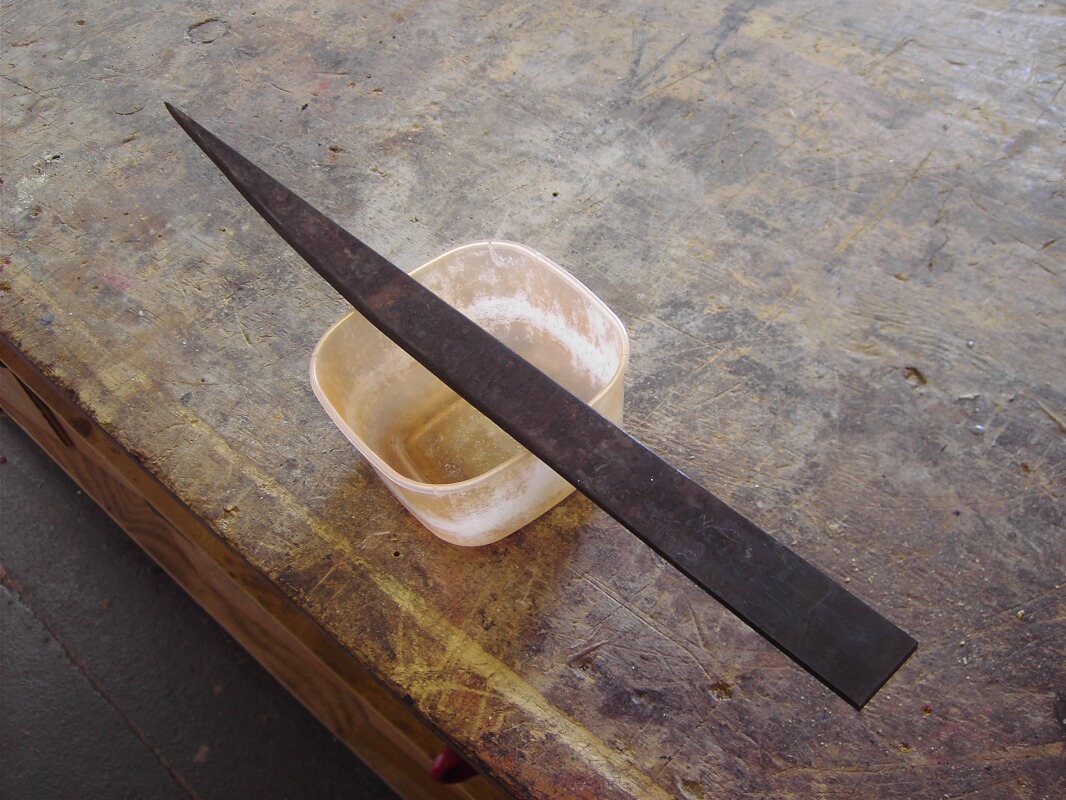
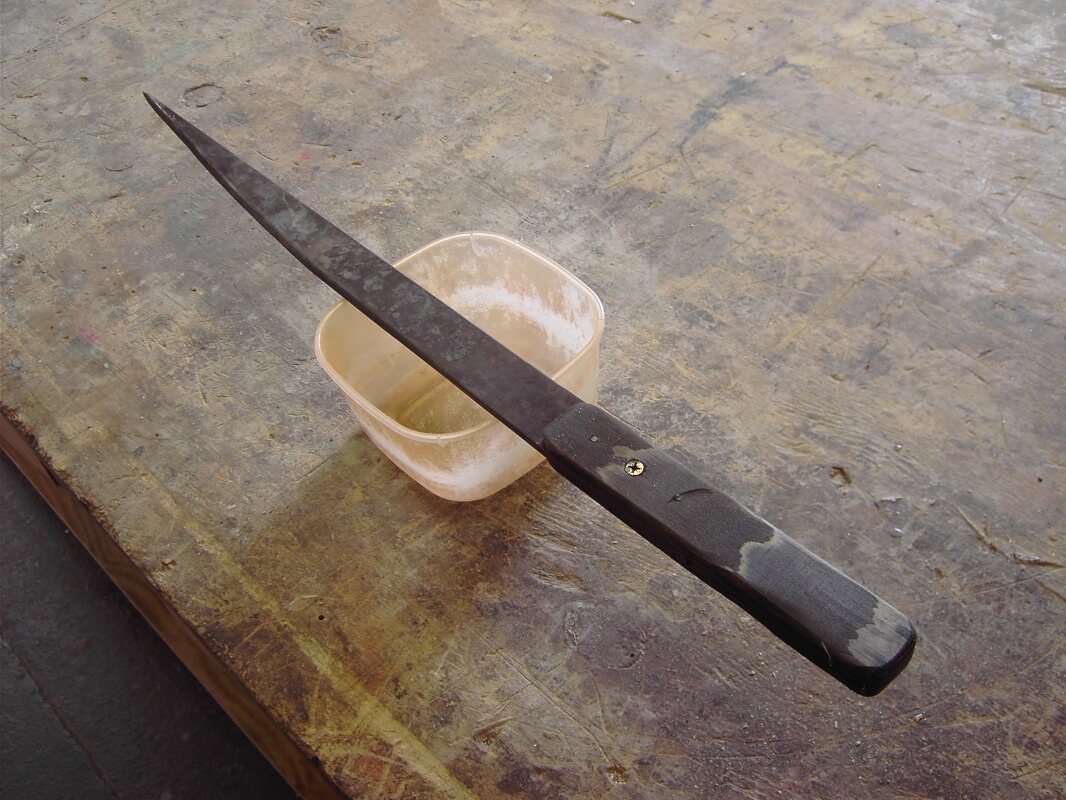
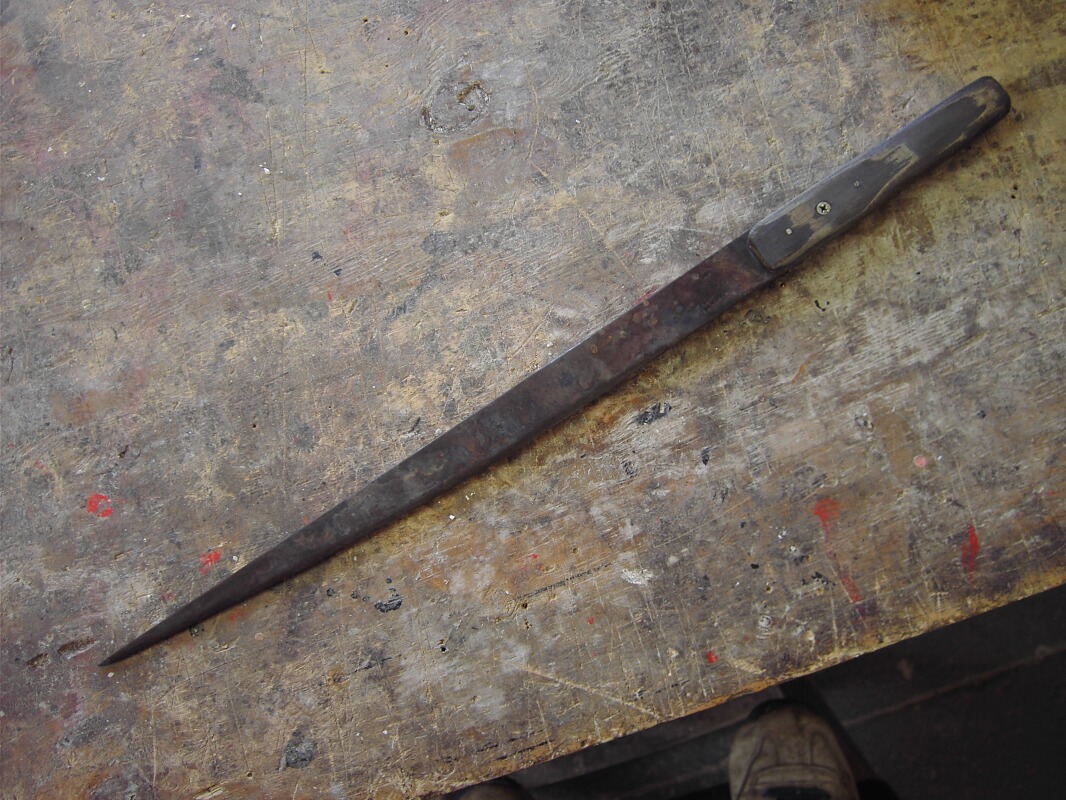
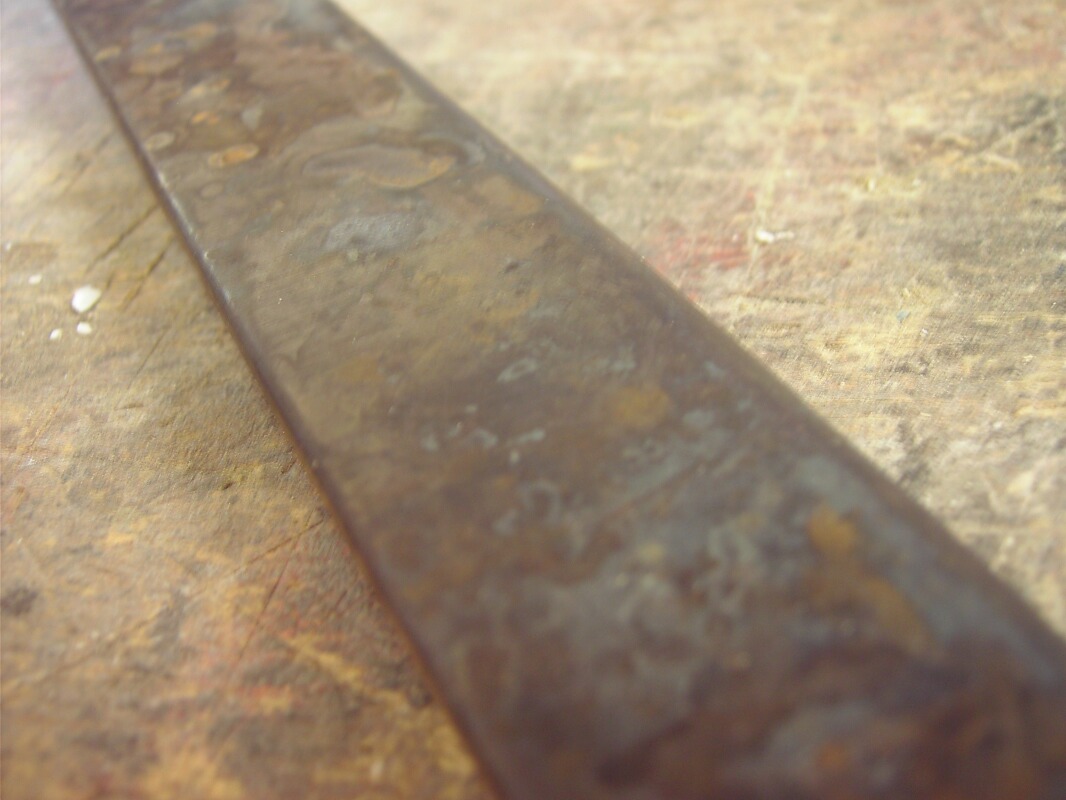
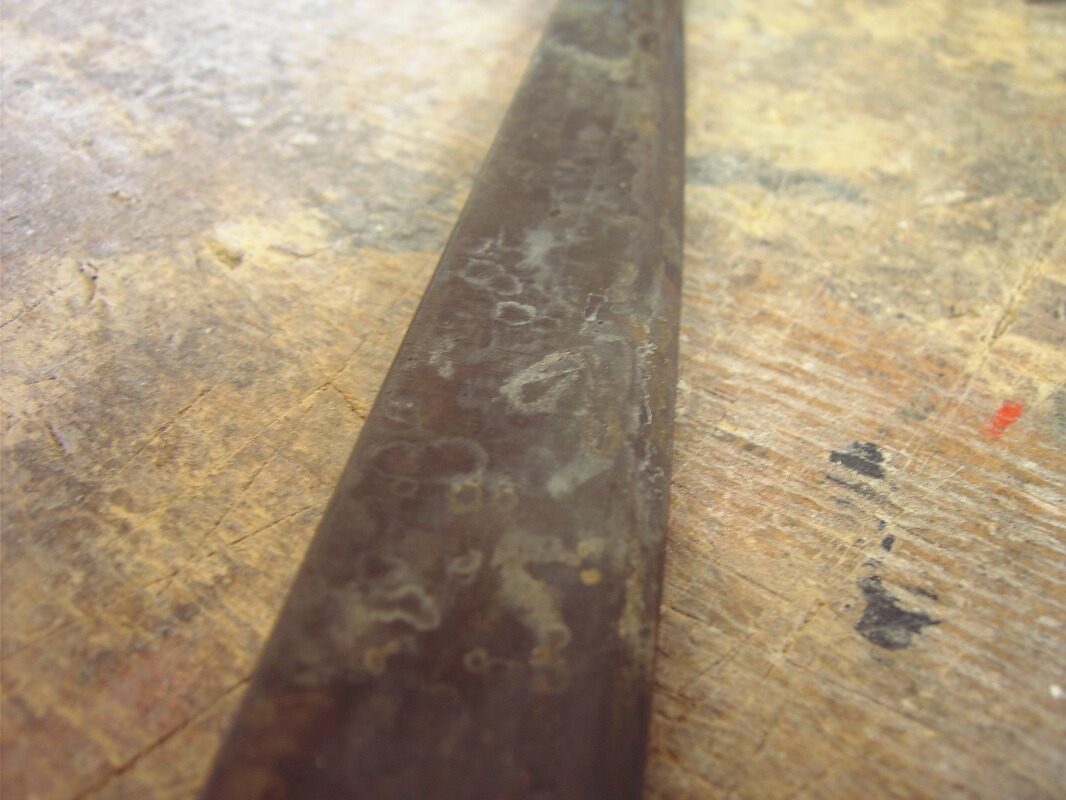
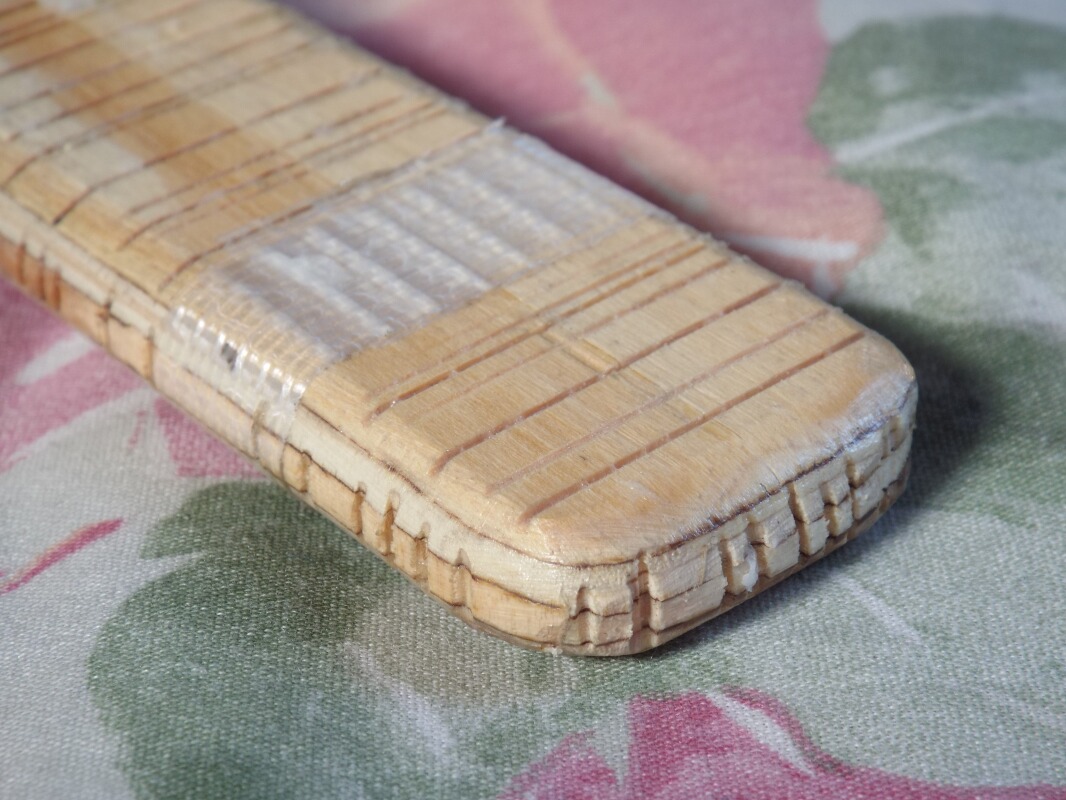
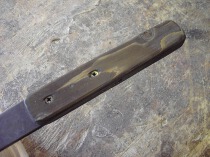
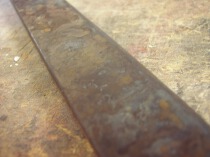
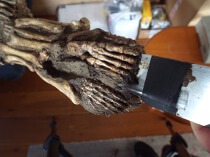
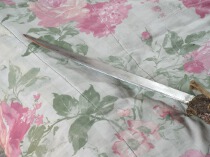
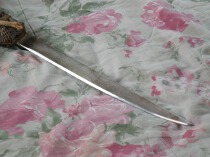
The next element was the metal blade. After doing some calculations based on the LeMarchand dagger I already had, along with working out scales from various film screenshots, I thought the knife should have a 16" blade and 8" handle, making it 24" long in total. While Tom has always said he used 1" aluminium bar, I wanted to use steel, purely as it's much easier to age. Steel will react with some aging chemicals going dark and rusting, whereas aluminium will not. To age aluminium you need to use paint effects which is much harder. On the flipside, aluminium is very soft and can easily be shaped with simple handtools, steel is much harder. I went for a piece 500mm x 5mm x 30mm. 30mm rather than 1" just so I had a little extra room to play with when grinding the blade. The grinding itself used a belt sander, a powerfile and an angle grinder, and even with these powertools it took around an hour to get the required overall shape and blade sharpness, so doing it with handtools would take so long it would just not be worth attempting. Then the blade was aged, using Decra Sheen and a blowtorch. Decra Sheen is used to age new lead strips in stain glass window repair, but it will also age steel, brass, copper and many other metals suseptible to oxidisation. Combining sprays of Decra Sheen from a water-spray-bottle, and heating the metal with a blowtorch, builds up an ageing effect which not only looks great, but will never rub off either. Lastly the metal blade was drilled and a plywood handle added just to lengthen the whole knife, and to give the Celluclay something more substantial to fix itself to, than just the metal.
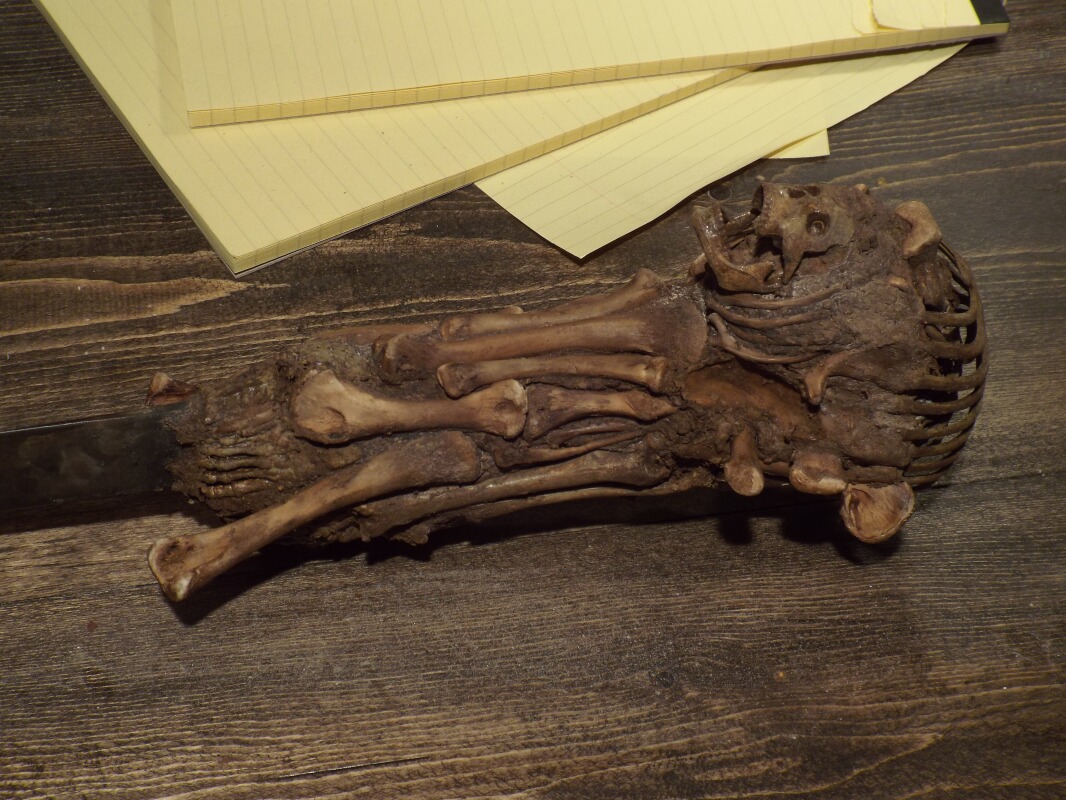
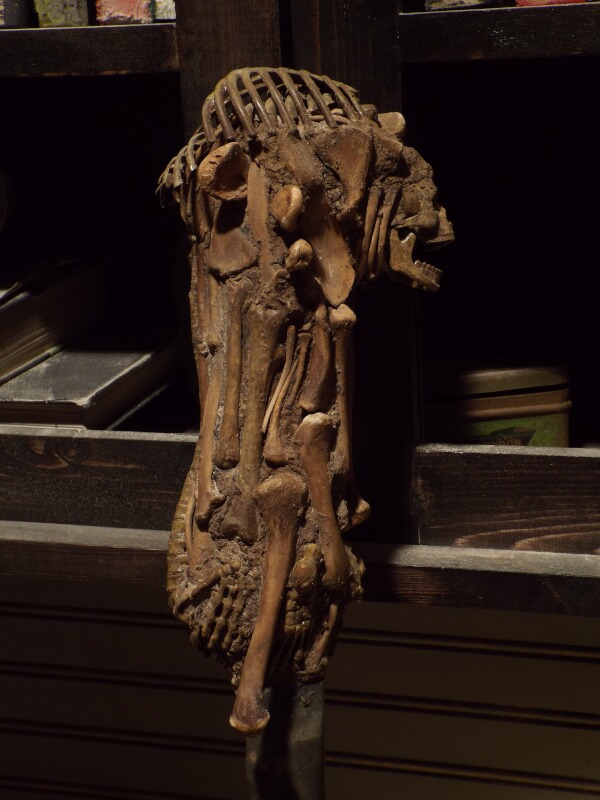
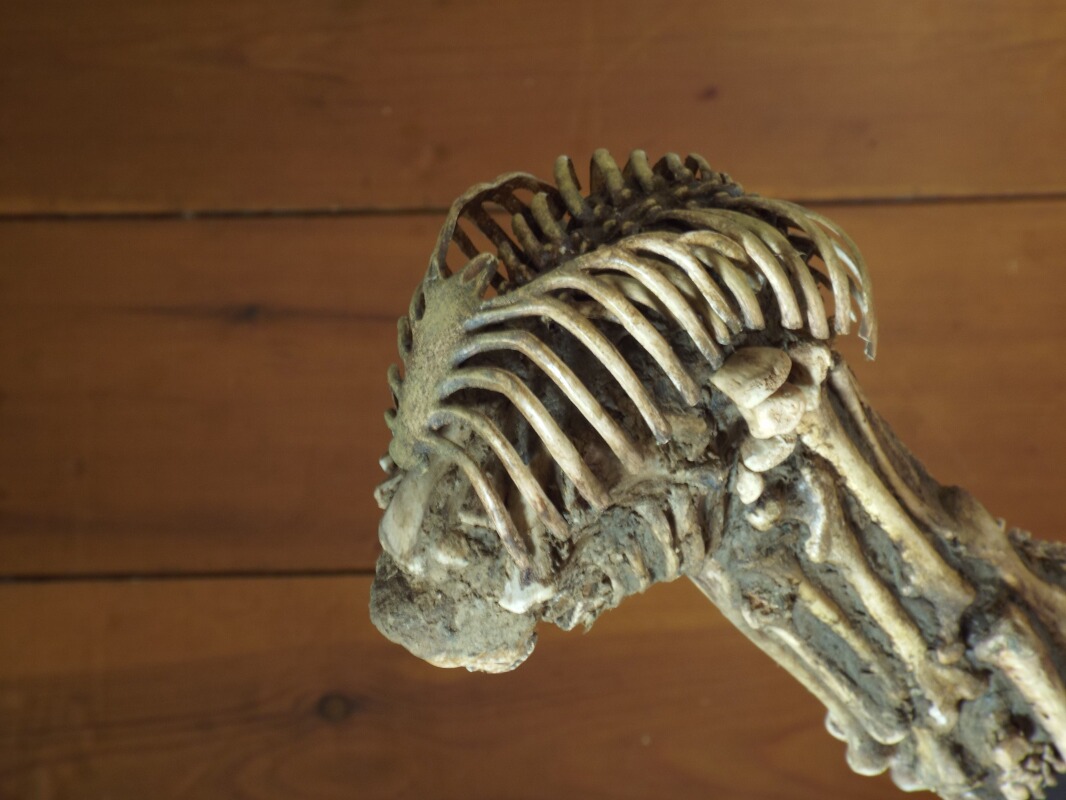
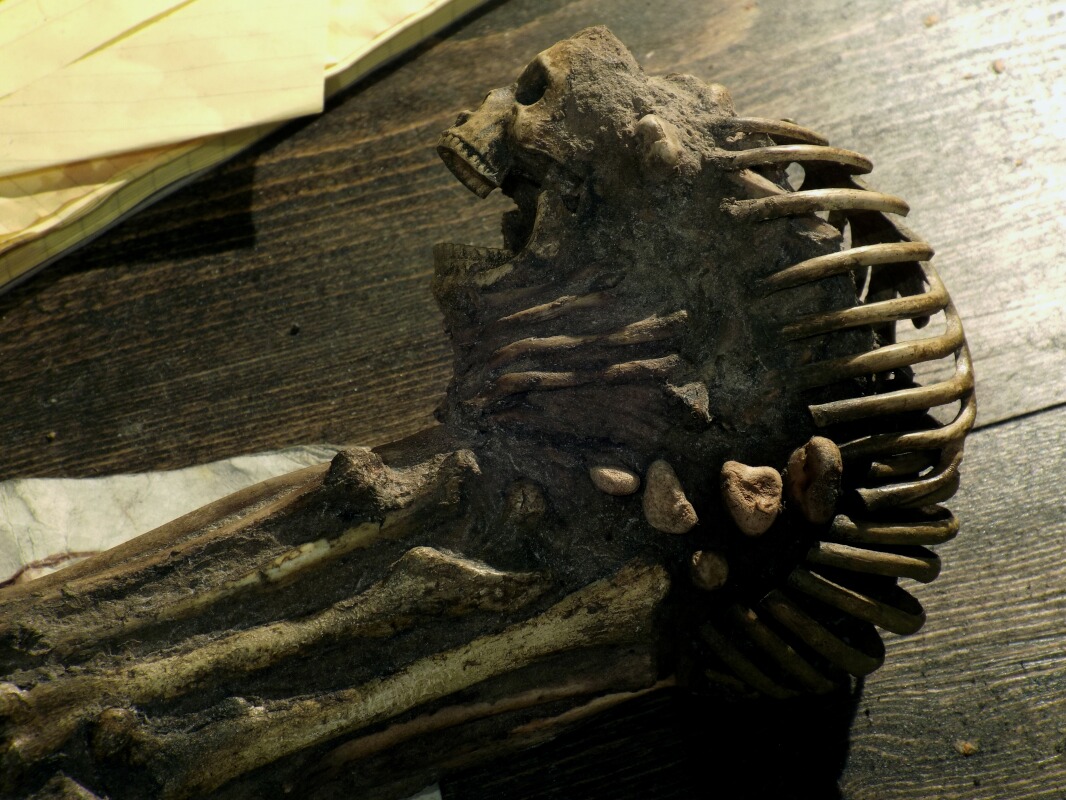
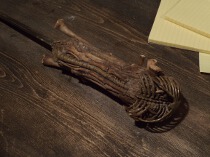
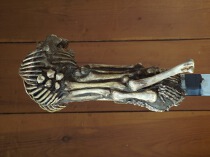
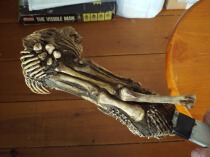
The final stage was to assemble the hilt, which took a few hours spread over one day. knowing what I know now I would have done things a little differently. I started by mixing the Celluclay with some very strong black coffee, which will give it a brown colour like mud. Some places in the film the base material appears gray, some places it looks brown, but I thought a dried mud-like colour would appear most authentic. I used around 120g of instant coffee dissolved in 100ml of boiling water, which was then topped up to 475ml with cold water. This was then mixed with half of the 1lb (453g) Celluclay packet; 226g. You need that much coffee to counteract the base gray colour of the celluclay and to get a dark enough brown. Once mixed it's the consistency of a very thick sticky fiberous porridge. While it will stick to things, if you have very thick sections (like where the skull is on the end, which on my dagger was a solid 2" lump), the Celluclay will sag. What I should have done is build up the handle as much as possible with wood, PVC pipe, plastic, etc just to give me the rough shape, and then only have around 10-15mm thick Celluclay which would hold itself fine. Anyway I worked from screenshots adding the bones, then once that was done I needed to support it with string tied round it and bits of wood as much as I could to stop the Celluclay from sagging & warping. It took a good four hours before the Celluclay was stiff enough that it no longer required any support, and probably 3 days suspended in the air to dry out fully (just to be sure it didn't warp). One it is hardened, it's surprisingly strong and really holds the bones, even the two hilt bones which stick out. I also found that if you put any leftover Celluclay in a sealed zip-lock bag and put that in the fridge, then it doesn't go hard and you can take little bits from that bag as needed if you want to touch up bits as it's drying. I found that I used most of the chicken bones I had, along with bones from both the Visible Man kits. The LeMechand dagger looks a little 'sparse', I wanted mine to be literally covered in bones. I wanted to mostly use the chicken bones as you can't get more real-looking than real bones. Finally I superglued the skeleton ribcage to the top of the hilt and blended it in with more Celluclay.

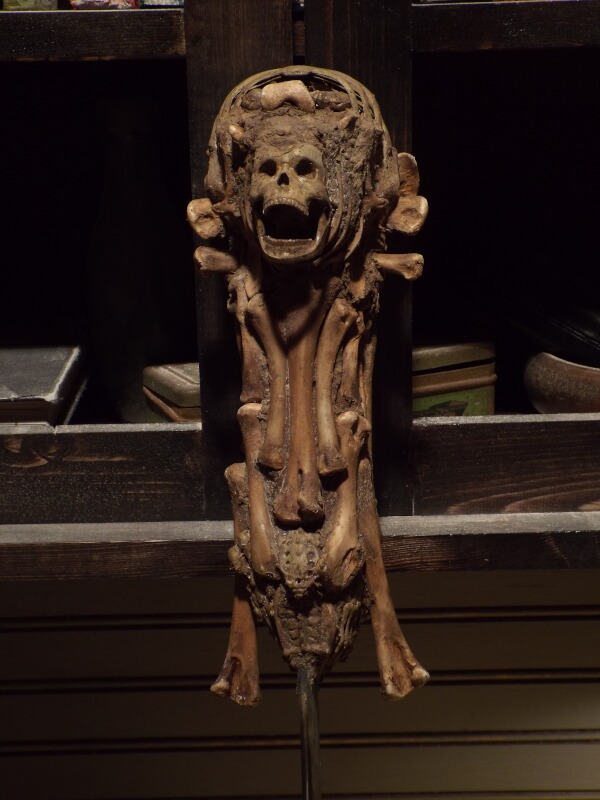
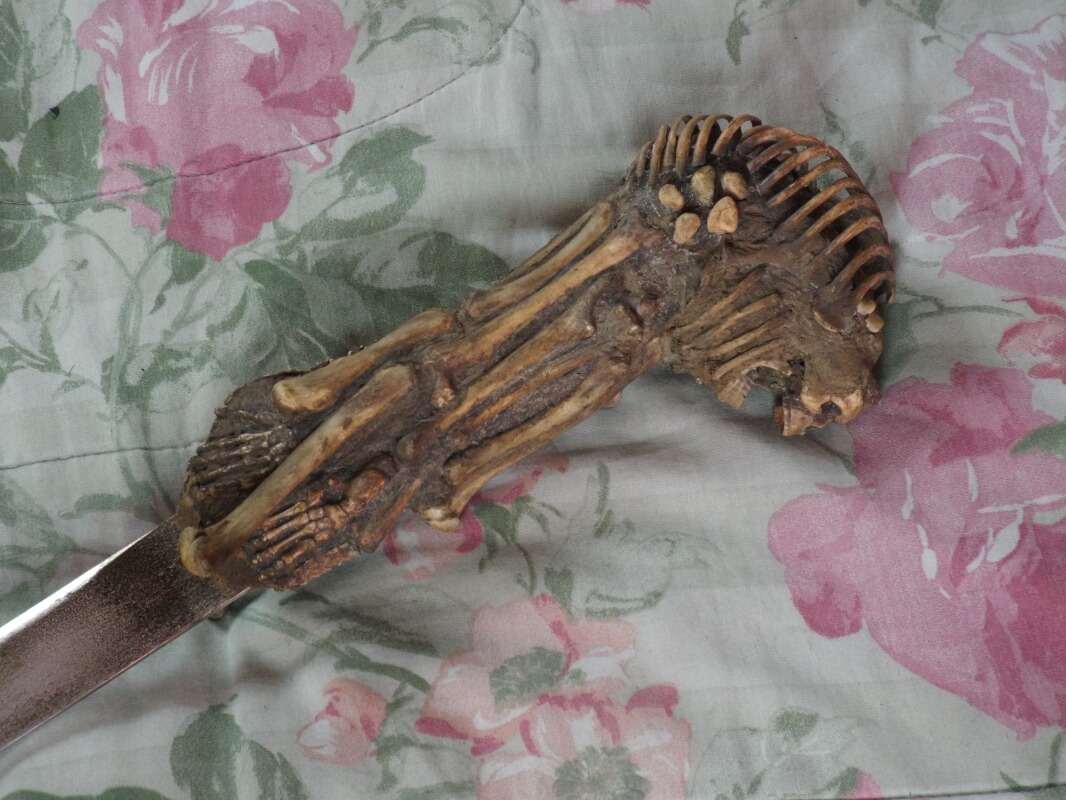
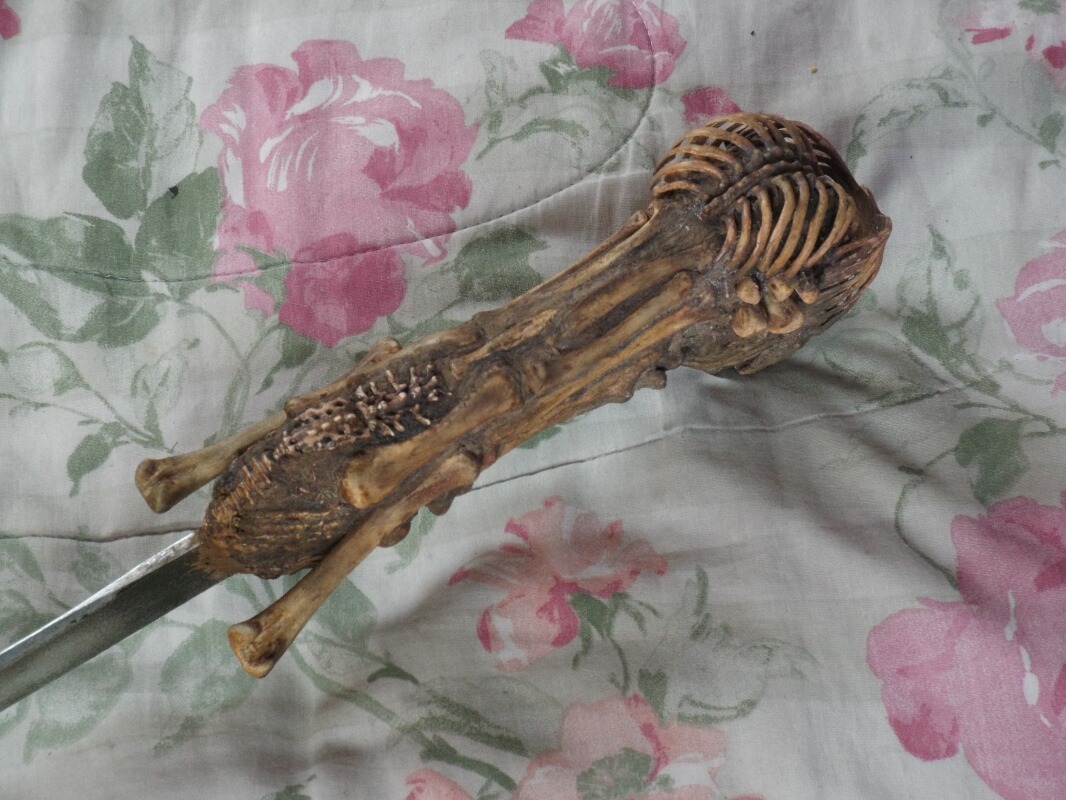
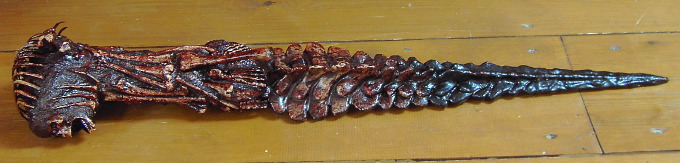
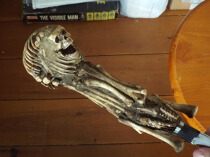
My completed The Evil Dead 'Kandarian' dagger replica, see more photos further down the page
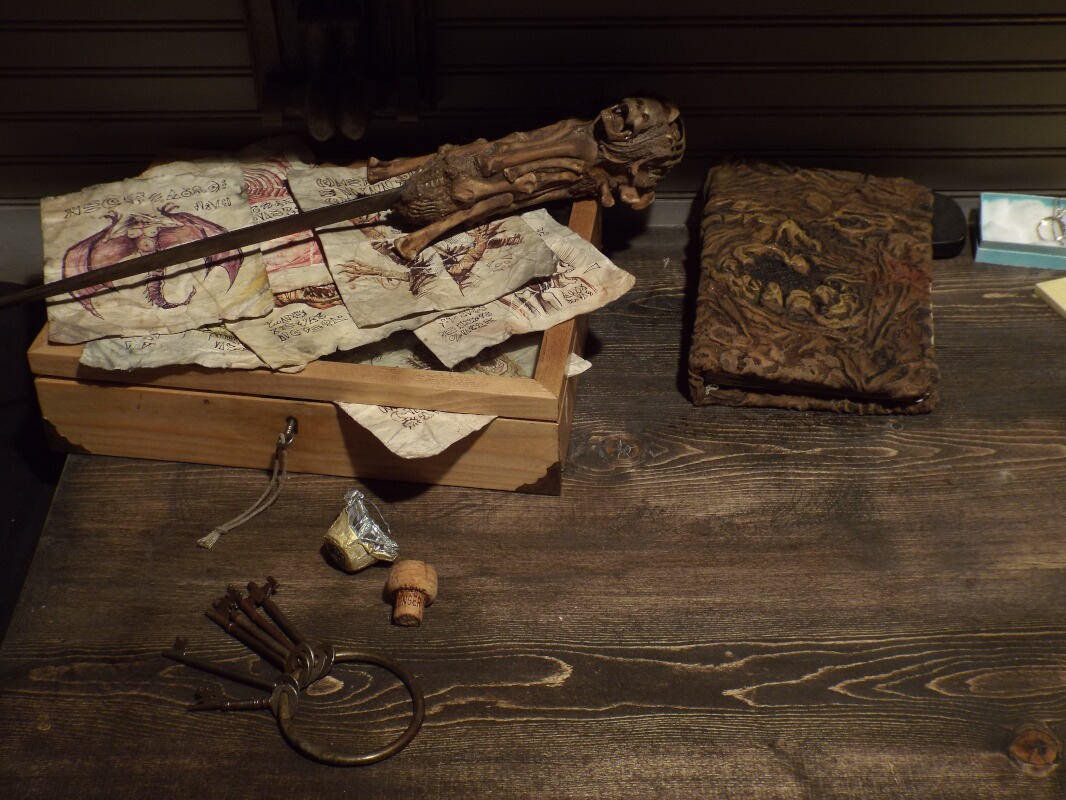
The last touch was to give the whole thing a dusting of Fuller's Earth with a paint brush. This gets into all the crevices and makes it look really aged. While mine does look more aged than the screen-used version, I think it does look more realistic.
In-Progress Project Photos
Below you can see a gallery of in-progress and completed replica dagger photos, which you can click to enlarge. I decided to keep the dagger clean, rather than adding any dried blood as per my previous LeMarchand The Evil Dead II dagger replica
 001 001 |
|
 002 002 |
|
 003 003 |
| |
 004 004 |
|
 005 005 |
|
 006 006 |
| |
 007 007 |
|
 008 008 |
|
 009 009 |
| |
 010 010 |
|
 011 011 |
|
 012 012 |
| |
 013 013 |
|
 014 014 |
|
 015 015 |
| |
 016 016 |
|
 017 017 |
|
 018 018 |
| |
 019 019 |
|
 020 020 |
|
 021 021 |
| |
 022 022 |
|
 023 023 |
|
 024 024 |
| |
 025 025 |
|
 026 026 |
|
 027 027 |
| |
 028 028 |
|
 029 029 |
|
 030 030 |
Completed Replica Dagger Photos
Below you can see a gallery of photos of the finished dagger, which you can click to enlarge. There are still a few little points which aren't 100% ideal, such as the hilt coming out a little too long; 9" rather than 8", making the blade look a little shorter than it should, it needs to be around 2" longer to look the right size. That aside, overall it's a decent enough replica.
 031 031 |
|
 032 032 |
|
 033 033 |
| |
 034 034 |
|
 035 035 |
|
 036 036 |
| |
 037 037 |
|
 038 038 |
|
 039 039 |
| |
 040 040 |
|
 041 041 |
|
 042 042 |
| |
 043 043 |
|
 044 044 |
|
 045 045 |
| |
 046 046 |
|
 047 047 |
|
 048 048 |
2016 Second Attempt
In December of 2016, I decided to have a second attempt at this project, to both correct some of the errors in the previous version (as detailed above) and take more time over the construction of the hilt. For the most part, the materials & processes are the same as the original project, but with a few little differences; the blade & hilt can now be separated (the blade is held in as it's a tight fit), also the blade is aluminium as per the screen-used version, and there is blood tubing running from the hole next to the blade to the open mouth on the skull to allow the skull to bleed as per the screen-used version.
In-Progress Project Photos
Below you can see a gallery of in-progress and completed replica dagger photos, which you can click to enlarge. I decided to keep the dagger clean, rather than adding any dried blood as per my previous LeMarchand The Evil Dead II dagger replica
 001 001 |
|
 002 002 |
|
 003 003 |
| |
 004 004 |
|
 005 005 |
|
 006 006 |
| |
 007 007 |
|
 008 008 |
|
 009 009 |
| |
 010 010 |
|
 011 011 |
|
 012 012 |
| |
 013 013 |
|
 014 014 |
|
 015 015 |
| |
 016 016 |
|
 017 017 |
|
 018 018 |
| |
 019 019 |
|
 020 020 |
|
 021 021 |
| |
 022 022 |
|
 023 023 |
|
 024 024 |
| |
 025 025 |
|
 026 026 |
|
 027 027 |
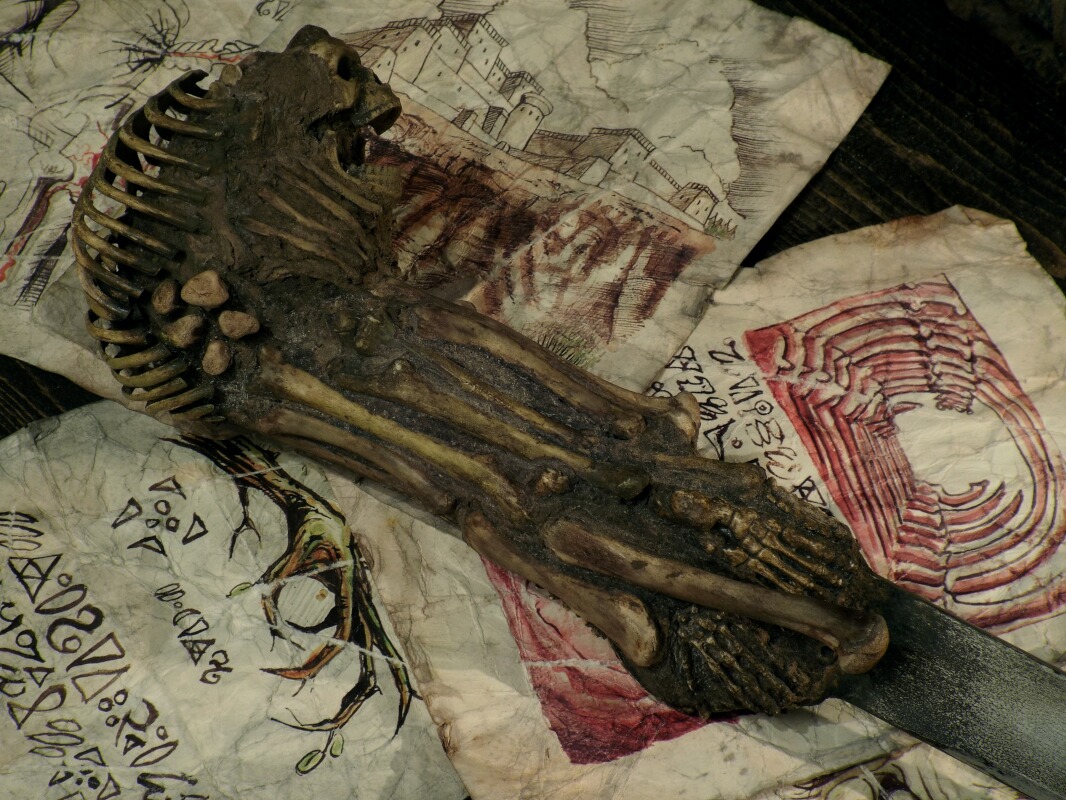
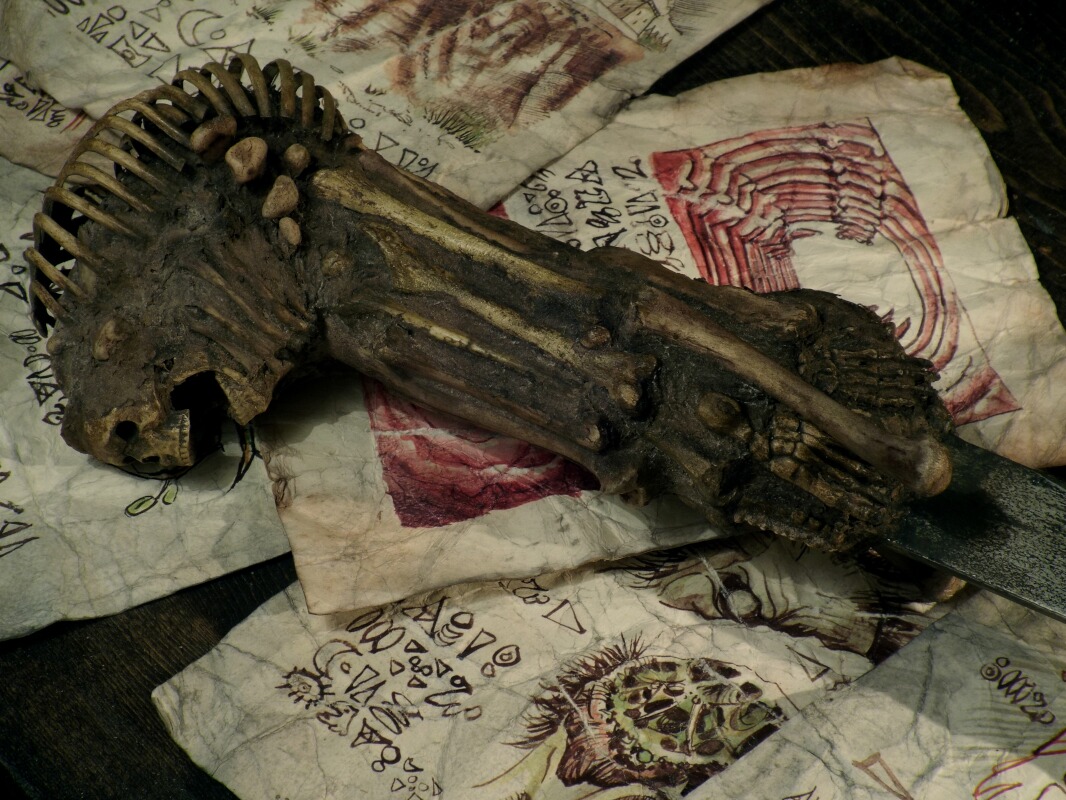
Completed Replica Dagger Photos
Below you can see a gallery of photos of the finished dagger, which you can click to enlarge. I was much happier with this version over the previous one. Once I was able to compare them, I realized just how inaccurate the first one was. As the blade is removable, I could in theory, create an Evil Dead II style bone blade which could be simply swapped out, but for now I'm happy with it the way it is.
If anyone out there wants to make their own dagger replica, you should be able to source all the materials I used from either Ebay or local stores, and you can download the high resolution The Evil Dead & Evil Dead II Blu-Ray screenshots & misc photos I worked from, within a ZIP file below.
If anyone has photos of their own dagger replicas, or any Evil Dead related replica items, please email them over so they can be added to this site's Collectables - Props & Replicas Section.
|